General Instructions for Constructing My Paper Models
Paper models are conceptually simple to cut and assemble. There are many ways of successfully doing this. Here are the things that I do and materials I use when building paper models. This page, complete with active links, can be found at http://bit.ly/sBRUKf
EquipmentThere are several pieces of equipment I use when building paper models:
First, there are two ways to cut the pieces from the sheets: with scissors or with an X-Acto knife. Scissors are safer, and X-Acto knife is more accurate. Parents: I would not advise to let your young kids use X-Acto knives because they are so sharp (which is also why they work so well). So, I will list two alternatives for cutting -- scissors and X-Acto knives -- although you can use both if you want. Scissors are sometimes faster.
|

Scissors

X-Acto Knife
Foam Core Board

Self Healing Cutting Surface
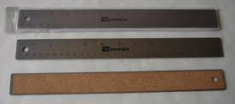
Stainless Steel Rulers

Spring Clamp (on left)
|
AdhesivesI use two different types of adhesives:
|

Elmer's Craft Bond Paper Craft Glue Gel
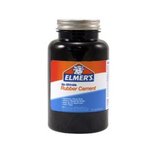
Elmer's Rubber Cement
|
Cutting the pieces
[Note: These instructions are influenced by the fact that I do a lot of cutting using an X-Acto knife, not scissors -- although recently I have discovered that sometimes scissors are better for some cuts. They are certainly faster and easier on your fingers and joints because you don't have to push so hard. A knife is better when you are cutting small features.]
I tend to do all of the same operation at the same time -- so, I do all of my cutting before I start scoring, gluing or assembling a model. To keep my sanity, I put all of the pieces from one sheet of the model (perhaps also including any text or illustrations) in it's own ziplock plastic bag. This way, I keep the parts of one sheet together and I know that a small piece hasn't gotten lost
I also tend to cut along all of the lines going in the same direction. This is more efficient although you may have to have a lot of pieces on a sheet in the process of being cut before you finish cutting any one part.
Press down hard on your cork backed metal ruler when you run your knife along the edge -- otherwise the paper will slip and your cut won't be straight.
For short cuts, I don't use a ruler: I find I can cut a relatively straight line freehand after a little practice. But for long edges, you need to use the cork back ruler as your guide.
Scoring paper pieces to make folding easier
To get folds to be accurate and crisp, you first need to score the paper using one of the tools described above. In general you should score the paper on the side of the paper where the fold forms a V.
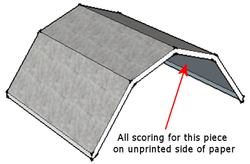
Sometimes the pieces you need to fold have a very thin edge on one side of the fold -- such as the edges of the roof in the illustration to the right. To help you make a crisp fold after you have scored the paper, place a small metal ruler on the small edge of the scored paper and hold onto the larger portion of the paper as you fold. The heavyweight paper used in these models is pretty tough so don't be afraid to overfold the crease and then bring it back to where you want it to end up.
Sometimes the pieces you need to fold have a very thin edge on one side of the fold -- such as the edges of the roof in the illustration to the right. To help you make a crisp fold after you have scored the paper, place a small metal ruler on the small edge of the scored paper and hold onto the larger portion of the paper as you fold. The heavyweight paper used in these models is pretty tough so don't be afraid to overfold the crease and then bring it back to where you want it to end up.
Gluing paper pieces
I use a toothpick to apply to the tabs of the paper. I find that a thin coat of gel paper glue applied to the tab followed by clamping the tab to the other side works best. From the time you touch the tab with the glue to the other piece of paper, you have enough time to position the two pieces together so that the joint is precise. Then you put the clamp on the joint. You can still adjust the positioning. Once you are satisfied you have the parts together, it doesn't take long (30-60 seconds) if you have applied a thin coat of glue before you can take off the clamp and proceed.
Gel paper glue provides the most solid joints and should be used when it is possible to clamp the joint. Sometimes, however you can't clamp a joint -- for example when attaching a roof to a building. You either have to glue one edge at a time using your fingers to apply pressure to the joint, or you have to use rubber cement. The advantage of rubber cement is that if you use it properly (applying thin coat of rubber cement to both sides of the joint and letting it dry before attaching) you don't have to clamp it. It forms its bond on contact. The disadvantage is that the bonds are not as strong as with gel paper glue. But, rubber cement is a lot easier to use in hard to clamp joints.
Gel paper glue provides the most solid joints and should be used when it is possible to clamp the joint. Sometimes, however you can't clamp a joint -- for example when attaching a roof to a building. You either have to glue one edge at a time using your fingers to apply pressure to the joint, or you have to use rubber cement. The advantage of rubber cement is that if you use it properly (applying thin coat of rubber cement to both sides of the joint and letting it dry before attaching) you don't have to clamp it. It forms its bond on contact. The disadvantage is that the bonds are not as strong as with gel paper glue. But, rubber cement is a lot easier to use in hard to clamp joints.
Specific Instructions
Here are specific instructions for cutting and assembling my paper models: